

Webguide
ONLINE PURCHASE
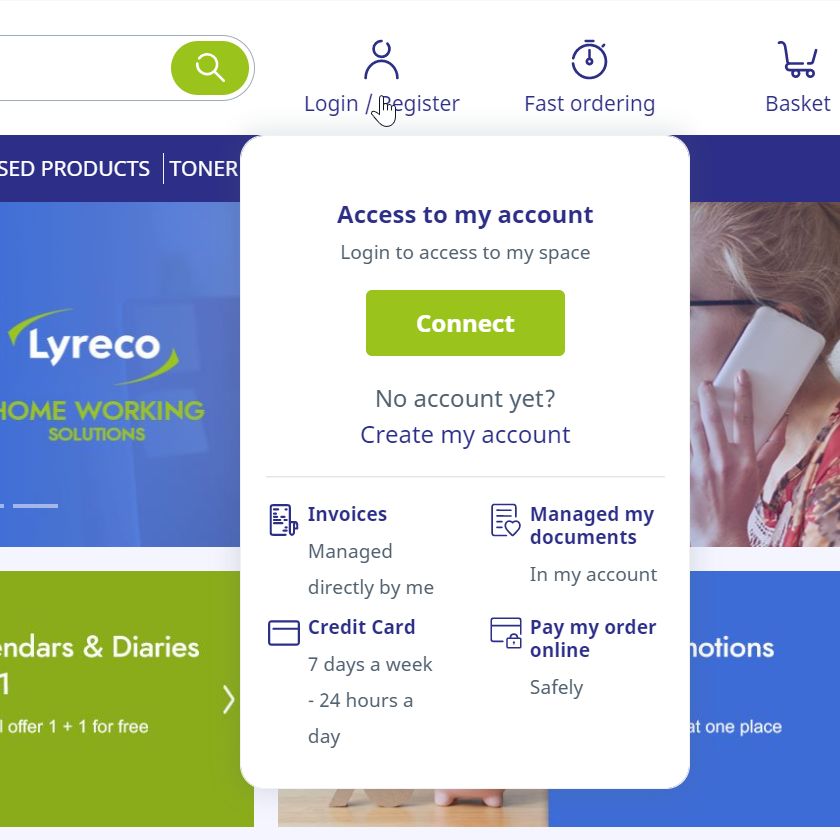
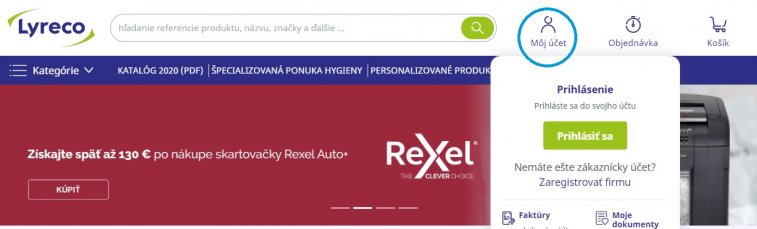
After arriving at our webshop, you can log in to your account in two places. In the left part of the page, in the "My Account" section or in the upper right corner.
In your profile you can set or edit the following:
- current contact details
- e-mail notifications
- order details
- your credit cards
- possibilities of receiving marketing information
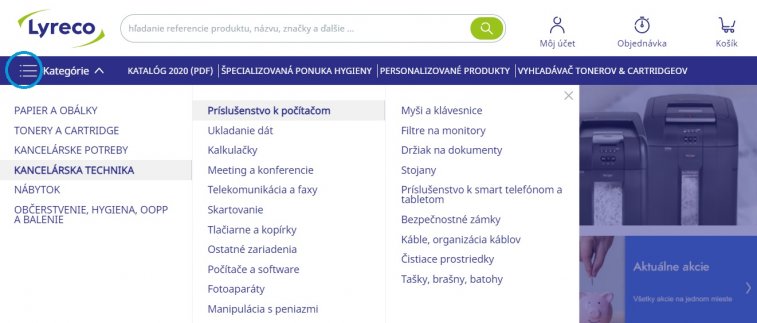
The main navigation menu, which consists of all catalogue sections, is displayed on the home page. Hovering the cursor over a specific section will display a drop-down menu with additional subsections.
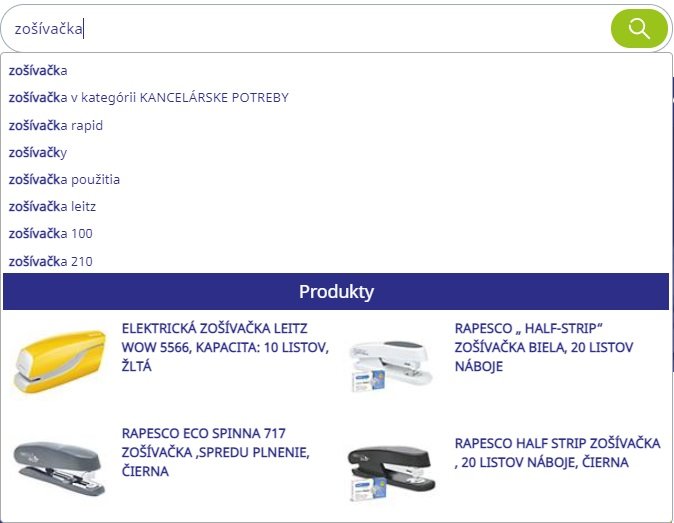
If you're looking for a specific item, you can paste its name or code directly into the internal search engine at the top of the screen. After entering a search term, you'll see advanced suggested terms, as well as a preview of 4 products, to refine your search and make it easier to check if a product matches your search term.
You can sort the products by name or price. Sort products by price is only possible if the search results in up to 100 products. You can view the search results as a “Grid” or as a “List”.

When choosing the right product, you can use the filter on the left side of the screen or directly insert 2 - 4 products into the comparator.

When using the Comparator tool, you can view all technical parameters or only differences - that is, only the properties in which the products differ from each other.

You can find the most information about the product on the product page:
- Product name
- A picture
- Key sales arguments
- Quick selection of products in different colours
- Product description
- Technical specifications
- Documentation
While shopping on our e-shop, you have several options for adding a product that you order regularly to your list of favourite products, so you can return to it quickly later. You can do this whenever you see one of these two symbols next to your favourite product:
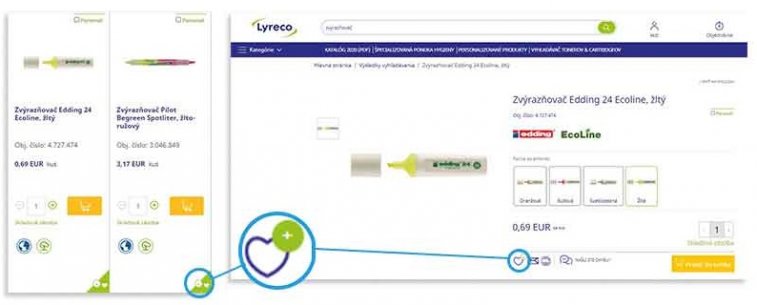
After clicking on the heart symbol, a pop-up window will appear, where you can choose from already created lists of favourite products or you can favourite products. create a new list of favourite products.

If you decide to create a new list, you need to name it, and if your account has multiple users under it, you have the option to decide whether the list is for you only or shared with other users. The shared list is usually used by major buyers, who share it with their buyers. Other users can no longer change this list. You can find saved lists of favourite products in your account - in the "Favourite Products" section.
Favourite list: Available only to the currently logged in user.
Private list: Only available to the currently logged in user and users created on the account with the same shipping address.
Shared list: The list will be visible to all users created under the same shipping address and all users below in the hierarchy.
You can download, delete or edit these lists. You can add individual products to the shopping cart in bulk (at the level of the entire list) or one at a time (after clicking on the list).
Another option is to upload your own list of favourite products using Excel, where one product code will be on a separate line. You can additionally change the quantities of the uploaded product from the list.
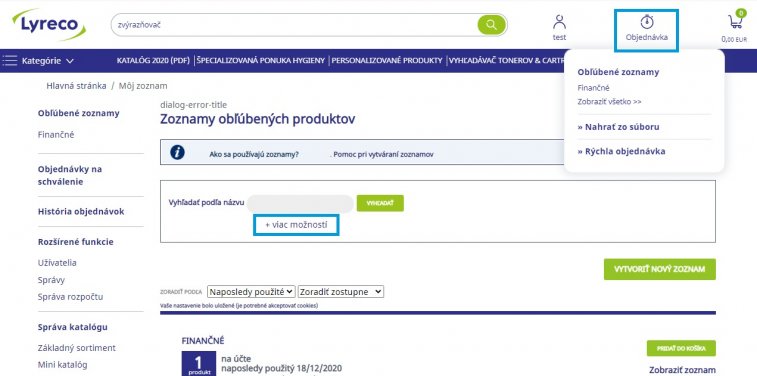
At the Favourite Product Lists level, you can also search for individual products by specifying specific criteria (such as a product number or product sharing type).

ADD YOUR PRODUCT TO THE SHOPPING CART
Once you find the product you are looking for, you can add it to your cart in several places:
• directly from search results
• from the comparator summary page
• after clicking the product from the product page
Just select the quantity and click on the Add to cart icon.

If you know the product code you want to order, just enter it directly into the internal search engine. After entering the code (without confirming with the Enter key), a drop-down menu will also appear with the option to add the product to the cart.
UPLOAD YOUR ORDER FROM FILE
Another way to add the desired products to the cart is to simply copy the required codes either directly into the field below on the page "Create order no. from file ”or by uploading from an Excel file. A template for creating an Excel file is available for download. Column A should contain the product codes and column B the quantity of product you want to order. After uploading the file, the products will be added to the cart.

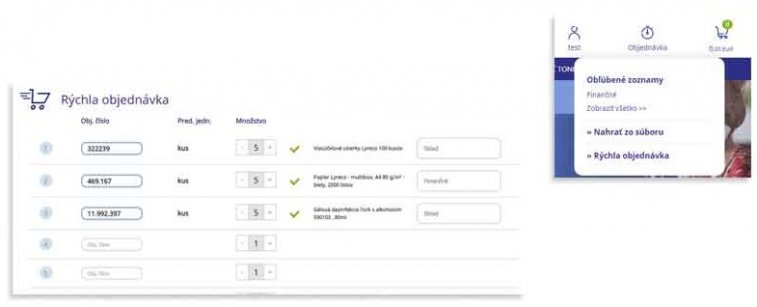
QUICK ORDER
Products can also be uploaded to the cart via the Quick Order link. After entering the product code, the system recognizes the product, reads its name and allows you to add a note. When you have finished uploading the products you are interested in, you can add them to your cart in bulk.
Once you have all the products in the basket, click on the basket located in the upper right corner of the screen. You can view a quick preview of the cart by clicking on the arrow or go directly to the cart by clicking on the cart icon. On this page, you can review your order before shipping:

OUR TIP:
As part of the approval process for orders in companies, our customers often take the opportunity to export the shopping cart to:
• Excel using the Export function
• PDF file using the Print function
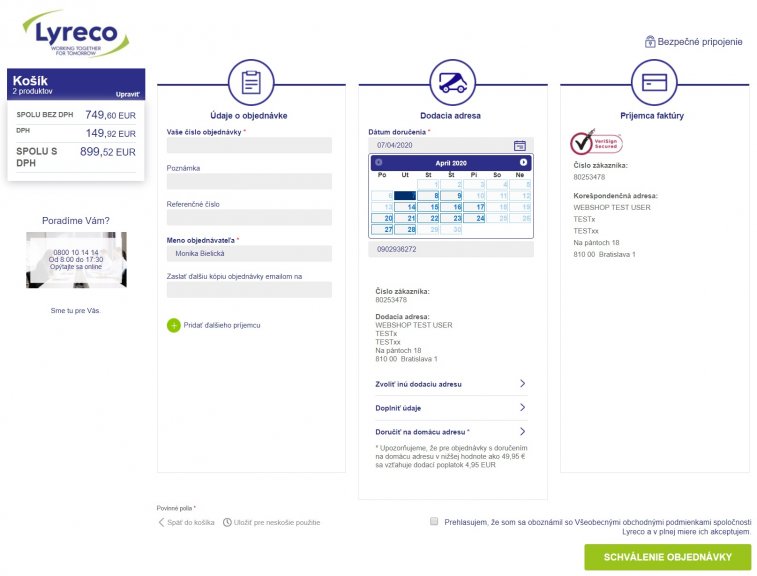
The next page displays order information, shipping address information, and the recipient of the invoice. Once all the necessary information has been filled in and the agreement with the General Terms and Conditions has been unclicked, you will complete the purchase process by clicking on the “ORDER APPROVAL” button.
OUR TIP:
In this step, it is possible to use the field Your order number for internal registration. You can find this field in the Order Details column. In the Shipping Address column, you can choose a delivery date for the order later than the default 24 hours.
NEW:
Before approving the order, select Delivery to the home address and fill in the data required for delivery.
After you submit your order, you'll see a summary of your order. On this screen you can send a summary of the order to any e-mail or print it out. At the same time, the expected delivery date is displayed again.
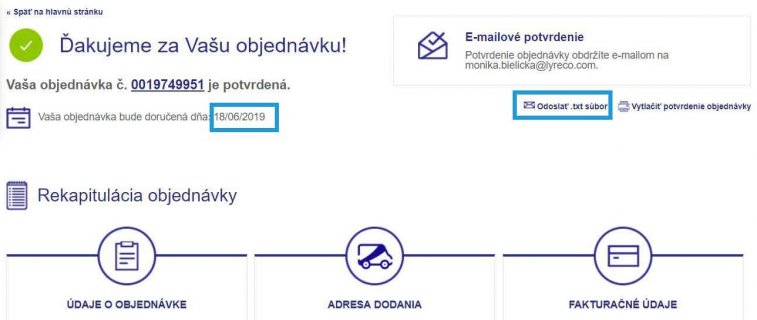
A confirmation of sending the order will be delivered to the e-mail registered in your profile. Your order will also be saved in the "Order History".
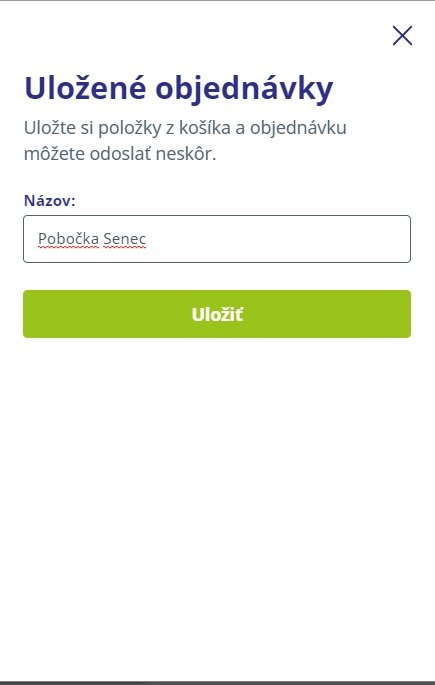
If you need to save the items you just put in the cart and work with them later, use the "Save Order" function. You will find a link to save the order in two places. At the top of the page next to the shopping cart, just expand the preview of the cart or directly in the cart next to the "Print" icon.
After clicking on "Save order", it is necessary to name the order you are going to save. All items in the cart will be saved this way and will be available in your account in the "Saved Orders" section.
To return to the order, just click on its name in your account. The saved order will be displayed and you will be able to add it to the shopping cart. If you already have another item in your shopping cart, the items from the Saved Order will only be added to it. Unused saved orders will remain in your account for one year. Then they will be deleted automatically.

WARNING:
If you are interested, we will be happy to set up the Approval-Customer hierarchy for you. Please contact our Customer Service.
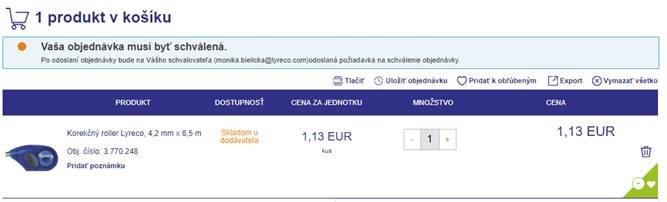
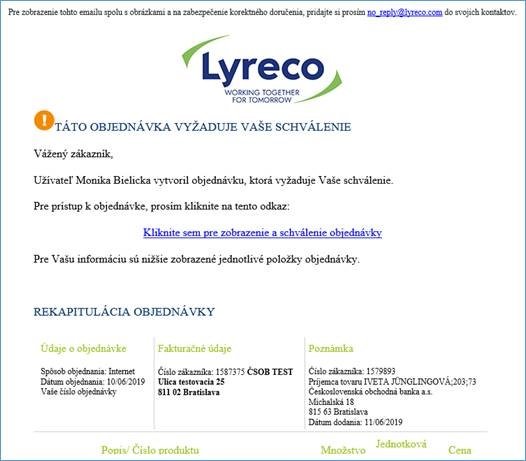
In some organizations it is necessary to approve orders by a superior or another appointed person - due to this purpose, it is possible to set the role of the Approver. If the “Approver” function is activated, all orders must be approved by the appointed Approver.
The customer creates an order according to their needs and sends it for approval, while information about the need to approve the order is displayed directly in the cart.
The customer will receive an e-mail confirmation of sending the order subject to approval. At the same time - the approver is sent an e-mail with a message to process the order.
The customer will receive an e-mail confirmation of sending the order subject to approval. An e-mail with a message is sent to the approver- to process the order.

After clicking on a specific order, the approver can then approve, change or delete it. The approved order is automatically sent to the system and can be found in the Order History.

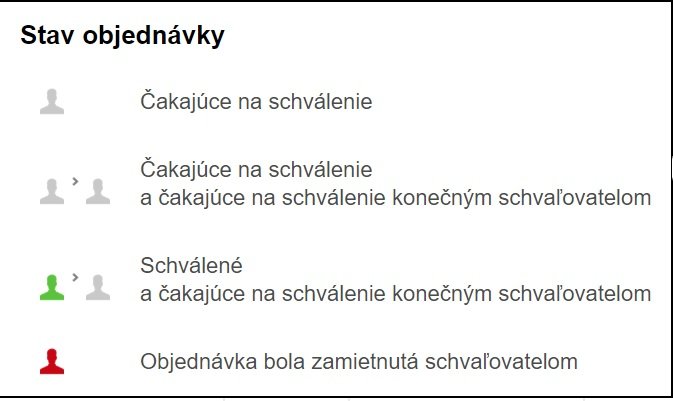
It is also possible to set 2-level approval of orders. What it looks like in symbols:
FINAL APPROVAL
The final approver has a similar function as the Approver. The Final Approver will receive orders that meet the required settings or limits in the case of a budget or Mini Catalogue. Situations in which the Final Approval approval process can be used:
approval of an order containing controlled products set in the Mini Catalogue
approval of an order that has exceeded a pre-set maximum price limit
approval of an order that exceeds a pre-set (total) maximum number of orders for a given period.
If the order exceeds one of these settings, a notification about exceeding it will appear at the top of the page (shopping cart). In this step, you have the option to change the contents of the order or wait for approval. After you submit your order, you will receive a confirmation of shipment for approval.
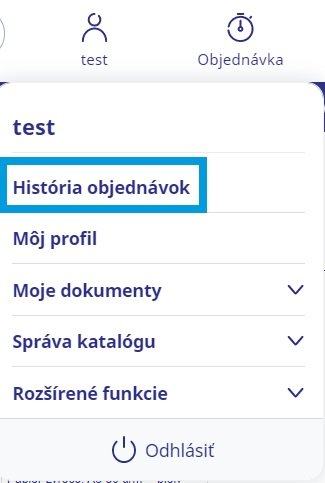
You'll find your order history in your account, and it allows you to track order information for the last 365 days. Here you will find all the orders you have placed with Lyreco, regardless of the channel you used to send them (telephone, internet, sales representative…).
If you want to search for a specific order, you can search for it by order number or other criteria (eg contact person, type of order or its status, etc.). You can also export all completed orders to a summary Excel file using the EXPORT ORDER HISTORY button.
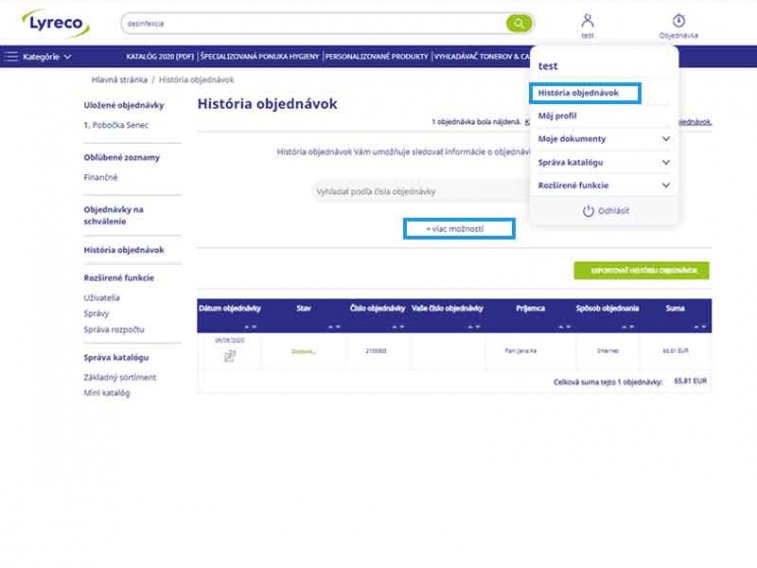
You can view the order detail by clicking on the relevant order line.
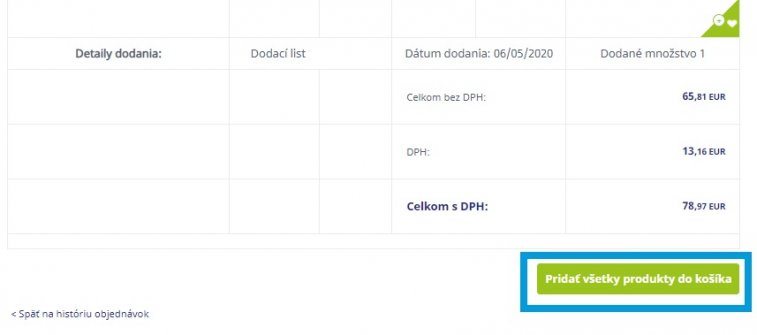
You can re-add products from each order to the cart by pressing the "ADD ALL PRODUCTS TO THE BASKET" button.
In the section Order history, you may check not only status of the order but also corresponding delivery.
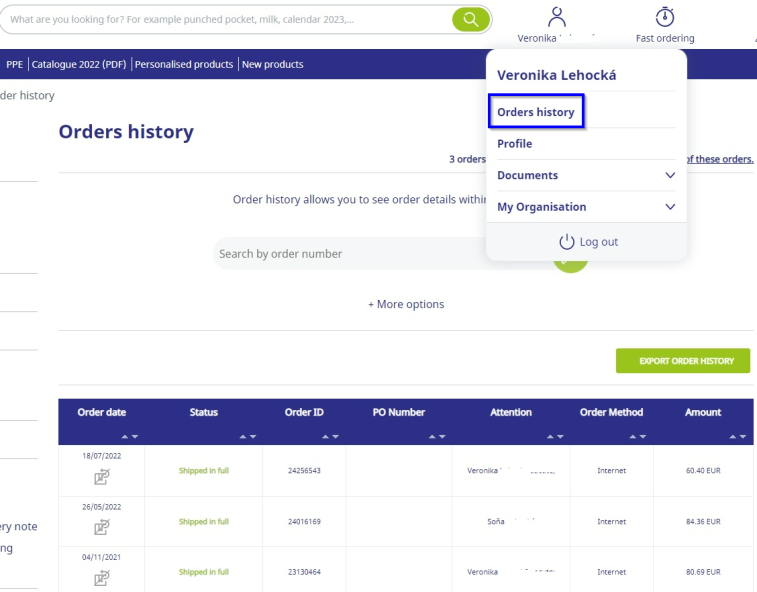
After clicking on the selected order, details of selected order will be displayed.
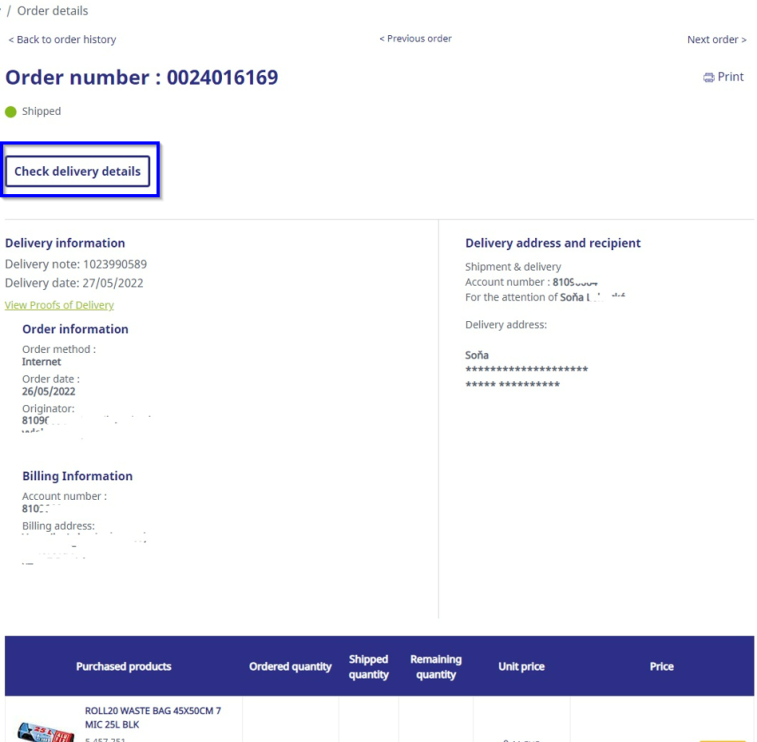
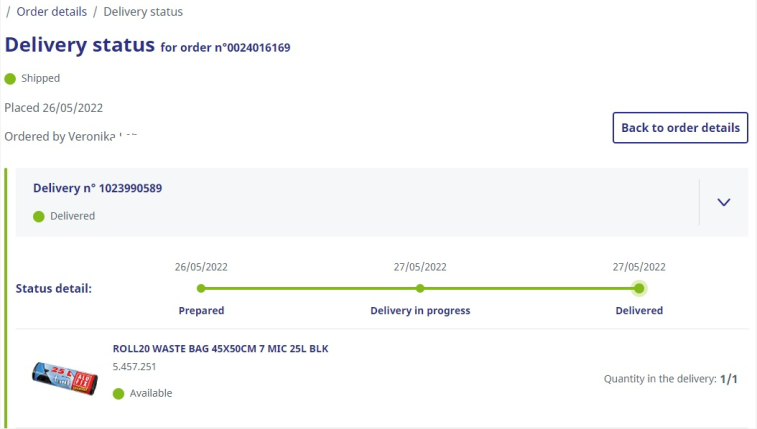
After clicking on "Check delivery status" you can view the current status of your delivery.
The return policy only applies to orders delivered in the last 30 days. Exceptions are orders with non-refundable items, such as specials, refreshments, etc.
It will also not be possible to return orders that have not yet been delivered or goods that have already been requested for return. You can access the Return of Goods function via the Order History in the “My Account” quick access, as described in detail in the ORDER HISTORY chapter. You will see a list of orders and one of the following icons in the Order Date column:


Returns are possible
By clicking on this icon you will be further directed to the process of returning goods via the online system.

Return of goods is not possible
This feature is not available because the order is older than 30 days, the goods have not been delivered or the order contains only non-refundable items.

The return of the goods has already taken place
In this case, the goods have already been returned from the given order.
Once you click on the blue "Return is possible" icon, you will get to the next step, where you will be able to choose whether you want to return all items of the order or just some. Once you have selected the individual items and their quantity, click on "CONFIRM RETURN OF GOODS".
Then you will see a pop-up window where you choose the reason for returning the goods and check the box with the agreement that the selected items of goods are either incorrect, damaged or remain in the original undamaged packaging. Then just click on the "YES, I CONFIRM" button. Or close the pop-up window to interrupt the return process.

OUR TIP:
Please note that the Lyreco driver reserves the right to refuse to accept the goods if the goods are not in the original packaging and the return of these goods requires it (does not apply to goods that are defective or damaged).
CATALOGUE
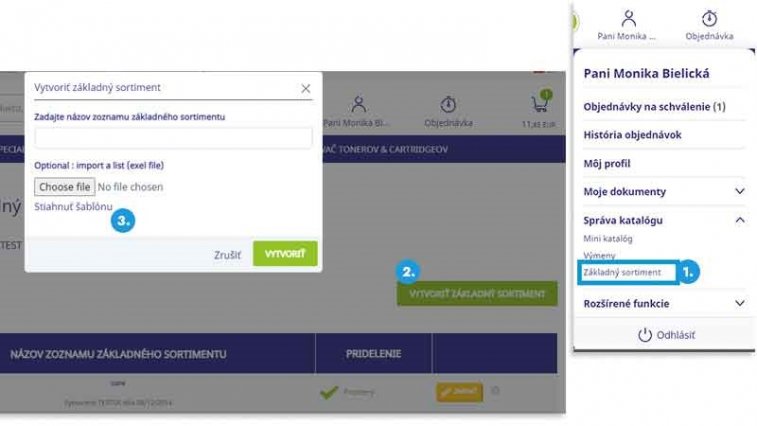
The basic assortment is a function that allows you to mark the products to be preferred when buying, but does not limit the offer of other products. Products selected for the Basic Assortment are marked with an icon.
You can manage your basic assortment in your account in the section "Catalogue management" - "Basic assortment".
To create a new list of basic assortment, click on "Create basic assortment", where you need to create its name and where you can upload the list using a template.
NOTICE: If you need to set up the Basic Assortment, please contact Customer Service.
OUR TIP:
Click on "Download template" to download the Excel file in which you save the list of SAP codes (column A - Products of the basic assortment). You can then upload the file by clicking on the "Select File" icon. Click the "Create" button to complete the list creation.
After clicking the change button next to the relevant list, it is possible to add a product to the list of the basic assortment by entering the product code in the field "Add product to the search of the basic assortment" and then by clicking on the "Search" button. The product you add to the list by clicking the "Add" button will be displayed.

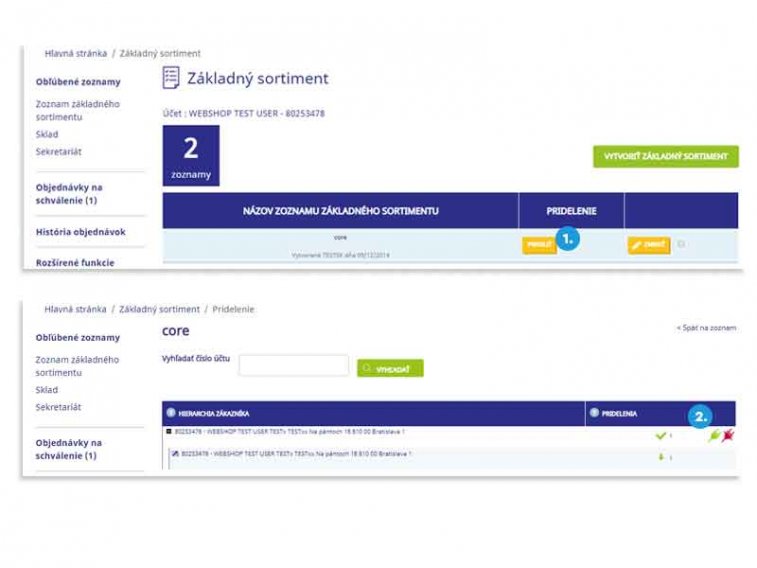
The list of the basic assortment can be exported to Excel or updated in bulk by upload. The created list of the basic assortment must then be assigned to a specific account.
On the page with an overview of all lists of the basic assortment, select the List you want to activate in the “ASSIGNMENT” column and click on the “ASSIGN” button to activate it.
Then click on the green plug to mark the account (and all its sub-accounts will be automatically marked) to which the list will be assigned. The assignment success is displayed at this level
green symbol and change the status to Assigned in the selected list.

As soon as the basic assortment list is activated, the basic assortment icon is displayed assortment in several places. On the product page, in search and in the cart. The list of searched product can be sorted according to your list of basic assortment. The products marked in your list will then appear first.

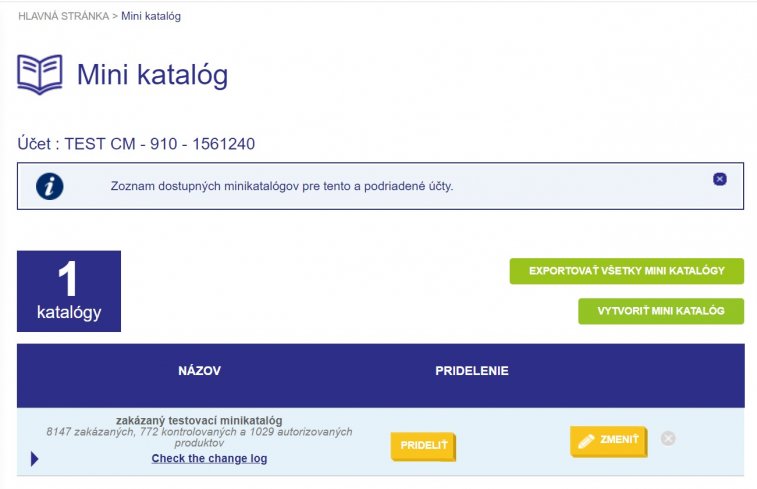
In some situations, customers need to limit the range that can be ordered from a given account. The Mini Catalogue is used for this purpose. The mini catalogue thus makes it possible to limit and control the range of displayed products that can be ordered. When using the Mini Catalogue service, not all products in the offer will be displayed, but only those that you select in the Mini Catalogue. If you manage multiple accounts, you can have multiple Mini Catalogues created, but only one catalogue can be activated per account. The Mini Catalogue feature is available in the "Catalogue Management" section of your account.
HOW TO CREATE A MINI CATALOGUE
If you want to create a mini-catalogue, you need to decide at which account level you want to activate your Mini Catalogue. As soon as you activate the Mini Catalogue for one account, it will automatically inherit this Mini Catalogue and the accounts in the hierarchy below it.
NOTICE:
If needed, we will be happy to set up the Mini Catalogue for you. Please contact Customer Service.
When creating, choose the name of the Mini Catalogue and you can also add a brief comment that describes your Mini Catalogue in more detail. An important decision is to select the status of the Mini Catalogue, according to which the entire content of the Mini Catalogue will be created.
Status:
Enabled - All selected products will be available to order
Forbidden - All selected products will not be orderable
Inspected - All selected products must be approved by the Approver before ordering (If the Approver function is activated)
Items in the Mini Catalogue can be imported from an Excel file. The download template is available within a popup window.
Important:
This import only needs to upload those products for which you plan a different status than the default Mini Catalogue status.

After creating the Mini Catalog, the product hierarchy will be displayed with the default status.
From this overview, it is possible to change the status of individual categories or even individual products. To change the status of the entire section, move the cursor to the “MARK ALL” column and click on the status icon you want to use. The status change will not take effect until the next day, after the systems update, which takes place at night.
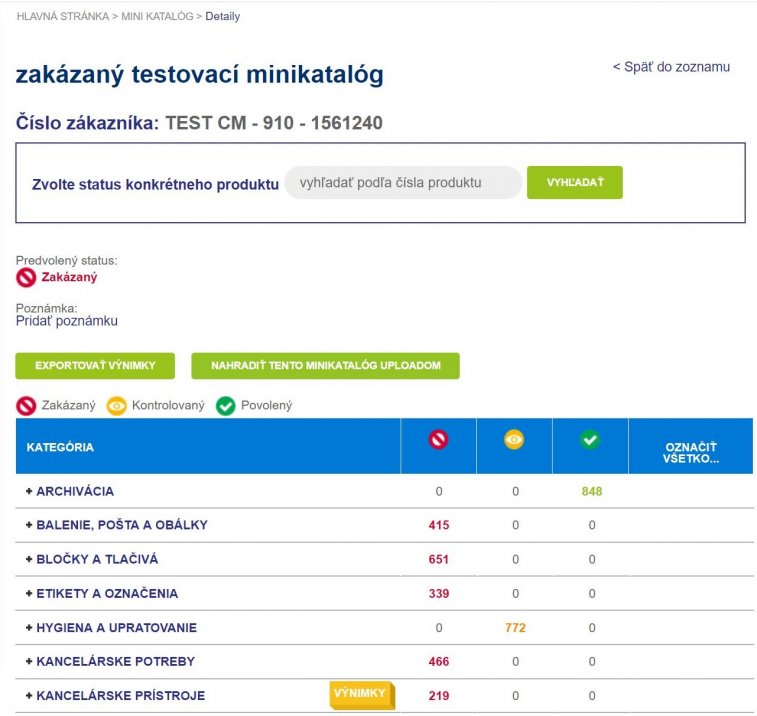
To change the status of an individual product, just search for the product by number and then adjust its status by clicking on one of the icons:

If necessary, it is possible to “EXPORT EXCEPTIONS” of the Mini Catalogue. It is therefore exported a list of all products that have a status set other than the default status of the Mini Catalogue. E.g. if the default status is "Allowed", all products that have the status "Disabled" or "Controlled" will be exported.
After editing the Mini Catalogue, it is still necessary to assign it to a specific account, which activates the mini catalogue. To activate the Mini Catalogue, you must return to the Mini list catalogues by clicking on the "Back to list" button.
On this page, select the Mini Catalogue you want to activate in the "ASSIGN" column and click the "ASSIGN" button to activate it.
The success of the assignment is indicated at this level by a green symbol✔ and by changing the status to Assigned in the Mini Catalogue list.

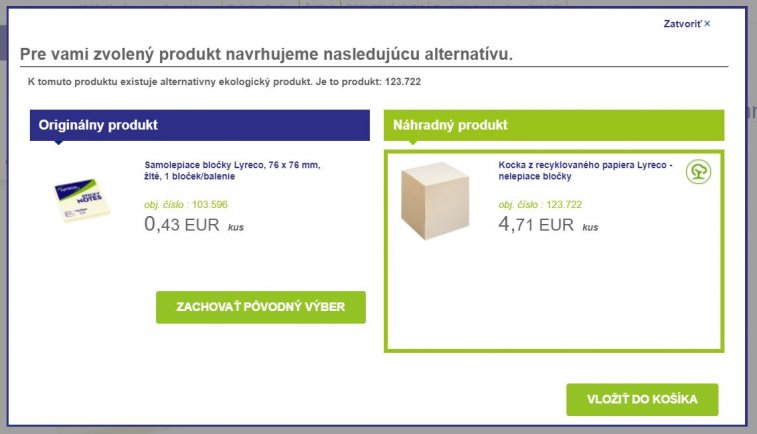
The Substitution feature allows users to replace one item with another. For example, if a user wants to order office paper that has an eco-replacement, we can set up a proposal in their account to exchange it for an eco-alternative. This exchange may be optional or mandatory. If replacement is optional, the user can decide whether to add the original product or its proposed alternative to the cart.
If the replacement is mandatory, the user only has the option to confirm the product change and the mandatory alternative is automatically added to the cart. When you try to purchase a product that has an active Substitution, you will see a pop-up window with information about the proposed exchange.
NOTICE:
Substitutions will be set up by our specialists. If you are interested in using this feature, contact Customer Service.
Products can also be included in the Substitutions in bulk. Just download the template in .xls, fill in the product codes and select the reason for the exchange, then import the file into the system.

ADVANCED FEATURES
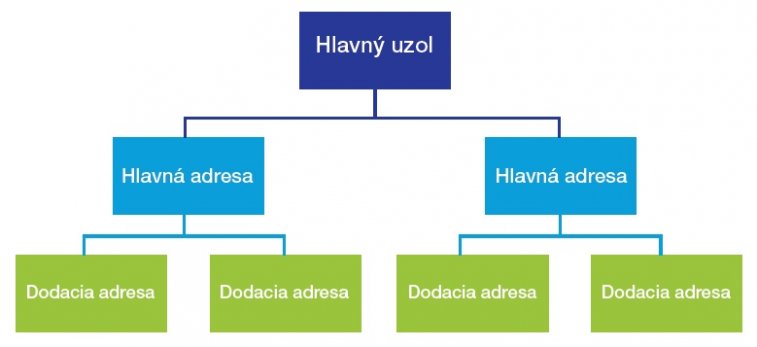
This function is mainly used by large companies or companies with a buyer for several branches. The customer hierarchy is divided into the following categories:
- Master node - has access and can order to all master and delivery addresses
- The main customer - has access and can order to all their delivery addresses
- Delivery address - can order to his delivery address and see the details of the main address
- Cost Center - 1 delivery address can have multiple cost centers (warehouse, marketing, HR, etc.). The cost center is always selected in the last step of the order.
If you have multiple shipping addresses enabled in your account, you'll find the switch between accounts feature in your account. This feature allows you to place orders through other customer accounts within a specified corporate hierarchy without logging in and out.
Select the user account in which you want to place the order by clicking SELECT. The recipient of the shipment is the owner of the selected account with the assigned delivery address.

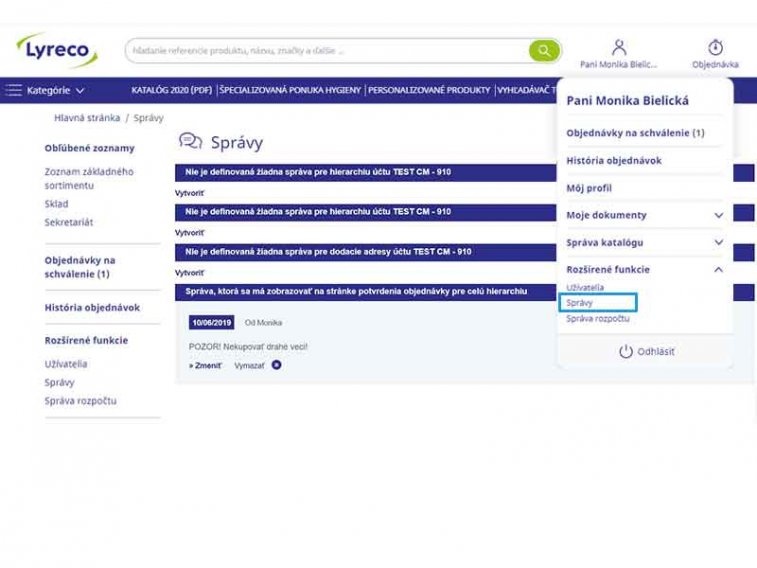
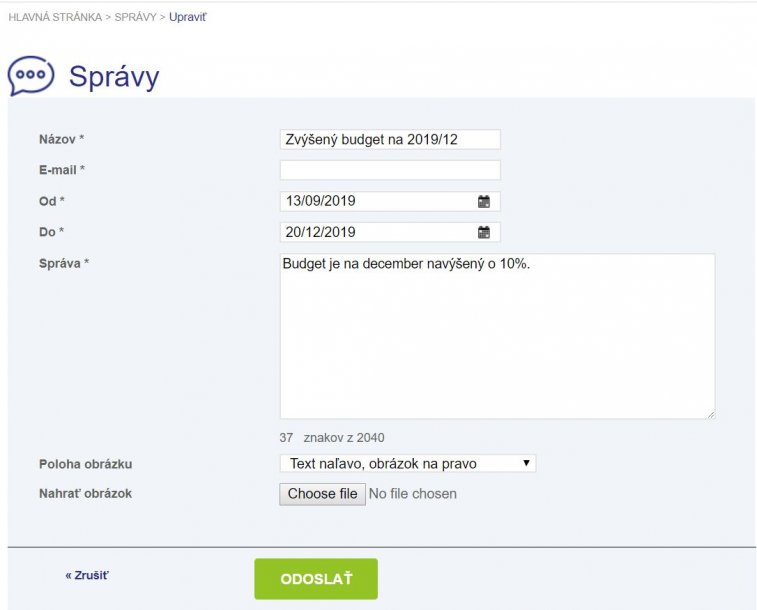
Within the webshop, it is possible to create messages that will be displayed to users as soon as they log in to their account. Reports can be created and edited by clicking on "Reports" in the "Advanced Features" section. There are 4 options where created messages can be displayed:
NOTICE:
Contact Customer Service to activate the Messages feature. To create a report, click on "Create" and fill in the displayed fields. You can also upload an image to your message to support your message - however, the size of this image should not exceed 30 kb. Once the message is sent, it will be displayed to the selected users after logging in on the home page at the top of the screen or after clicking on the "Messages" section. In the message box, the user can also reply to the message.
Costs associated with purchasing products for your office or operation are possible
check using the Budget feature. The budget created in your Lyreco account will be set for your company as a whole, regardless of the source of the order (by phone, e-mail, online ...). All orders will be bound by the set budget limits and if they are exceeded, the order will be stopped (regardless of the method of ordering).
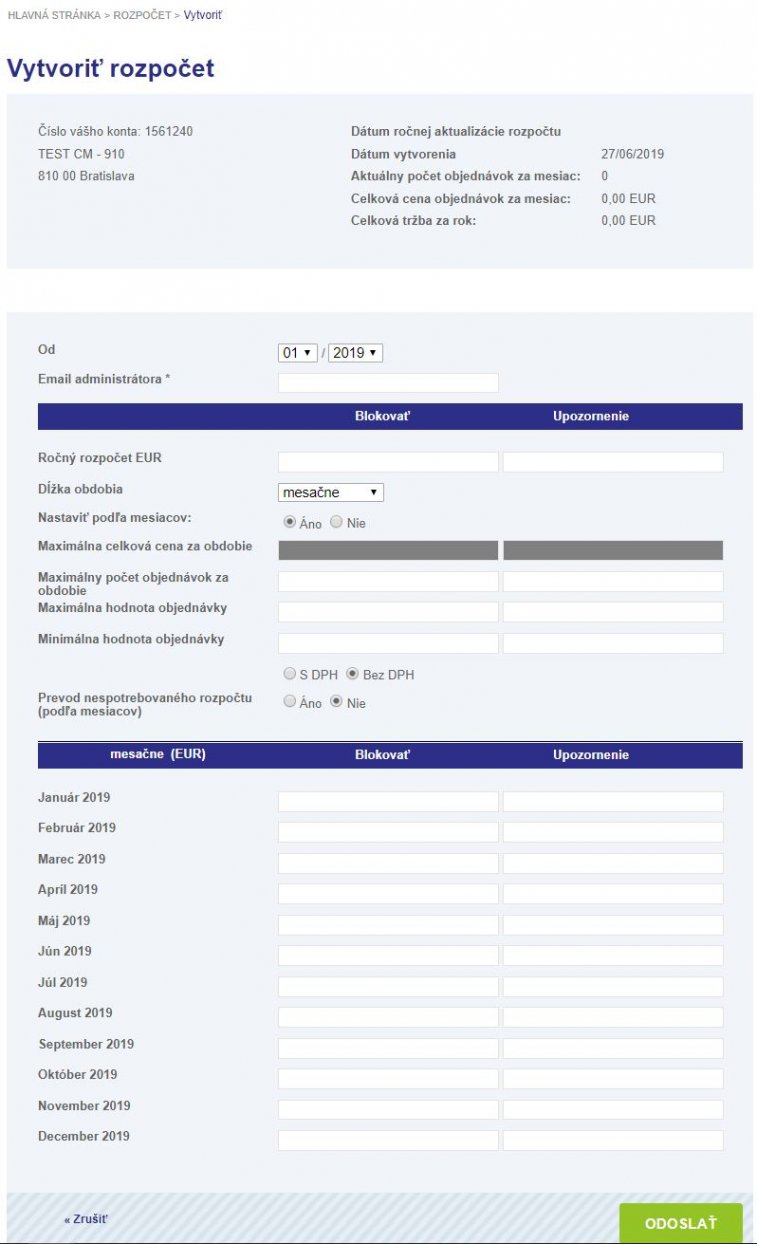
Budget limits and alerts can be set as follows:
- Total annual expenditure
- Maximum financial limit per month
- Maximum number of orders per month
- Maximum order amount
- Different time periods (monthly, quarterly, etc.)
If the values are set to "Blocked" and the user reaches the set limit, a message / notification will be displayed via a pop-up window.
A message / notification notifies him that the limit has been reached and therefore the order is blocked. Subsequently, the user must contact the budget manager, ie Customer Service, and request an increase in the limit before he wants to continue.
If the values are set to "Warning", the user will see a pop-up window with a message / warning that the set value has been exceeded. It is still possible to send the order, as it was not exceeding the set budget.
NOTICE:
Contact Customer Service to request a Budget setting.
If you need to adjust your budget to seasonal fluctuations in your spending, we can set your budget:
- Monthly
- Bimonthly
- Quarterly
- Seasonal
- Half a year
Once your budget is set, you'll see its limits as well as your ongoing consumption on the right below your account.

If you have the Reports feature enabled, you have access to reports on your spend:
- Visibility of consumption for a specified period (year / last 12 months)
- Consumption visibility (main node / main address / delivery address)
- Comparison of consumption between 2 years
- Accounts and addresses with "best" expenses
- Overview by sections
NOTICE:
If you are interested, we will be happy to set up Reports for you. Contact Customer Service.

OUR TIP:
Reports are available several days after monthly invoicing, usually data is available after the 10th of the calendar day of the month. Aggregate data is calculated each month based on the current hierarchy.
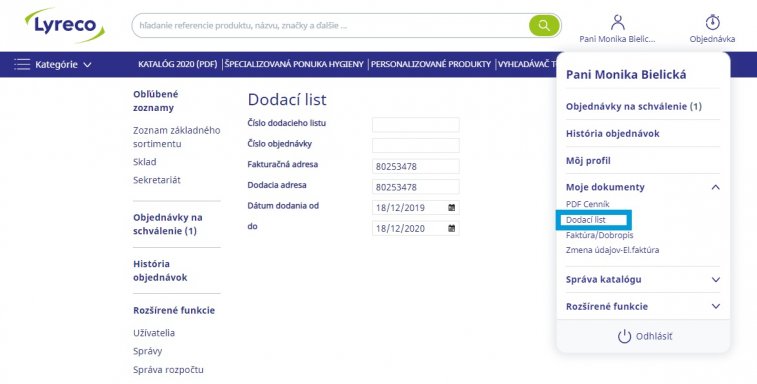
With the My Documents function, you have the option of sending an electronic price list to your e-mail address, where you will find copies of delivery notes, delivery receipts and invoices / credit notes. You can find all of these items in My Account access.
DELIVERY LETTER AND INVOICES / CREDIT NOTES
In the My Documents section you will find a list of all orders for the last 12 months. Select the order whose copy of the document you want to view. This copy will be sent to your account's email address within minutes.
This procedure is the same not only for Invoices, but also Delivery Notes and Credit Notes.
PROOF OF DELIVERY (POD)
You can also select a delivery receipt from the list of orders for the last 12 months. POD will be delivered to your email address within minutes. For recent orders, Lyreco needs 48-72 hours to process a scan of a POD copy. As soon as we have the scan available, it will be sent to you.

OUR TIP:
Lyreco also offers customers the opportunity to send invoices electronically.
Advantages of electronic invoicing:
- Hassle-free delivery
- Possibility to set more recipients
- Access to invoices 24/7
- Free electronic archive
- Online availability
- We save the environment
You can also activate electronic invoicing yourself via your account in the section My documents / Change of data - Electronic invoice. Or contact our Customer Service.
FREQUENTLY ASKED QUESTIONS
Webshop has a 15 minute inactive timeout. This means that if you leave the system inactive for fifteen minutes, it will log you out. This is to ensure a good response time by not having ‘ghost’ users and this is also for security reasons.
As long as your order is in the shopping basket then it will be saved as a suspended order. If you were at order submission stage, the order will reappear in the shopping basket as a suspended order.
Yes, if you have the Order Status option on your system the order will be shown here and state the stage it is at in the order cycle, including status of awaiting administrator approval.
Back buttons do not work because Lyreco’s online ordering system deals with live stock directly through our SAP system. The way that PCs cache information can result in incorrect product quantities being saved in the shopping basket, or the correct stock check process not being carried out. Back and Forward browser button used cached, not live information. Therefore, to move to the previous screen, you are encouraged to choose relevant menu options and action buttons in order to avoid problems with orders.
It usually means that you have not logged out correctly using the ‘Log Out’ option in the ‘My Dashboard’ area. If you have used the ‘x’ to close the internet the session may still be connected to Lyreco, therefore you will need to force a connection to break the previous connection. It is also worth checking that no one else has access to your login and password.
Webshop is secured with SSL (Secure Sockets Layer) 128bit encryption at login and order confirmation.